Hello everyone, I’m Henry from stbcodes.com. Over the years, I’ve tested dozens of IPTV players, but to be honest, the one I always come back to is TiviMate. Designed especially for large screens, it’s by far the best option for Android TV, Fire Stick, or similar devices.
What Makes TiviMate Special?
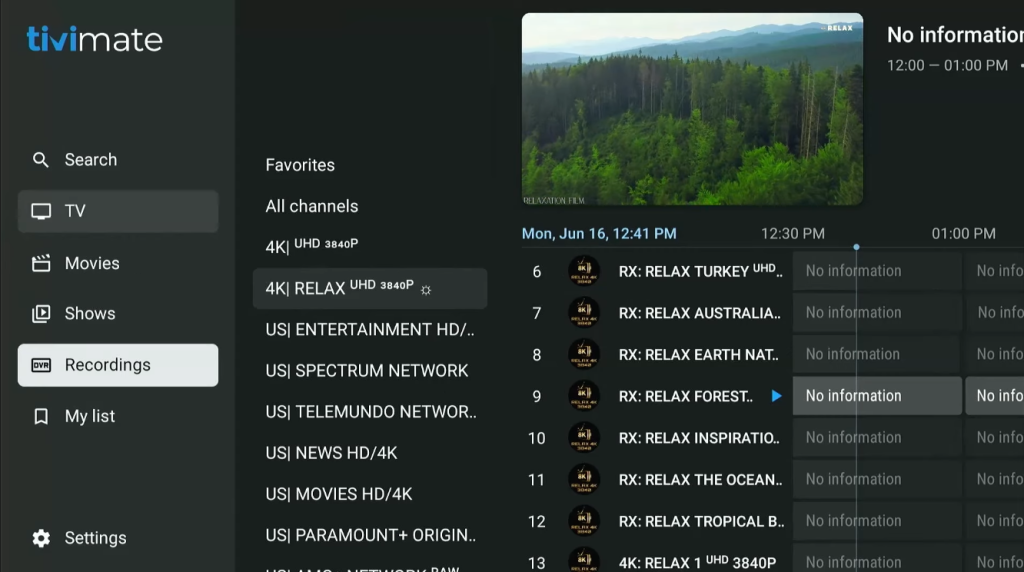
What really sets TV Mate apart for me is its authentic TV Guide-style interface. It’s super fast, highly customizable, and easy to navigate with a remote control.
Free vs Premium:
The free version is quite limited, but the premium version unlocks incredible features like recording, multi-screen viewing, and more (which I’ll explain below). I’ve been using the lifetime TiviMate premium plan for years and I’m very satisfied with it.
Important Note:
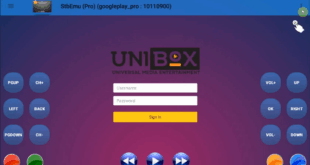
TV Mate does not provide channels. It’s simply a player that allows you to connect to your existing IPTV service (for example, Strong 8K or Eagle 4K).
TiviMate Installation (For Fire Stick/Android)
For those who haven’t installed it before, here’s a quick guide. I personally use a Fire Stick, but the process is the same for Android devices:
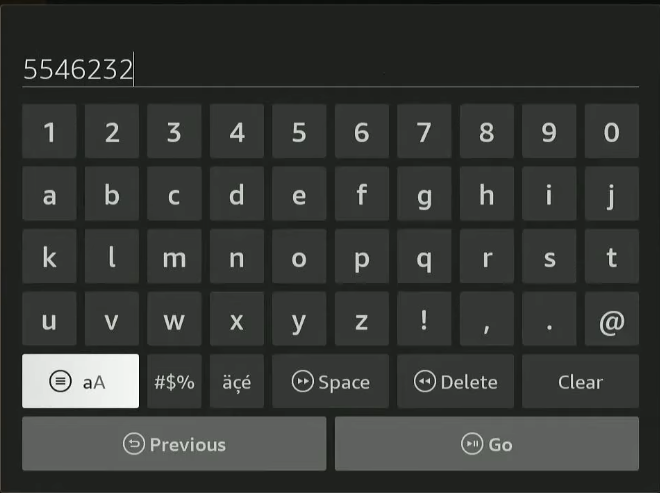
- Open the Downloader app on your device.
- Enter this short code in the search bar: 5546232
- You’ll be directed to my website, where you can find and install the TiviMate app.
Best Features of TiviMate
1. Add to Favorites & Quick Access
- While on a channel, long-press the Select (OK) button on your remote.
- Choose “Add to Favorites” from the menu.
- Press the left arrow on the main screen to access the Favorites tab and see all your saved channels in one list.
2. External Player Integration
To reduce buffering or improve VOD playback, you can use an external player (e.g., MX Player).
Go to: Left Arrow > All Channels > Use External Player and activate it.
3. Change App Language
Navigate to Settings > Appearance > Language to set your preferred language.
4. Multi-Screen (Multiview) — My Personal Favorite!
Want to watch two matches or broadcasts at the same time?
From the Options menu, select Multiview.
Note: You’ll need an IPTV subscription that supports multiple connections to use this feature.
5. Picture-in-Picture (PiP)
With this feature enabled, you can keep your current channel playing in a small floating window while browsing other apps or menus.
6. Parental Control
If you have kids, enable Parental Control from the settings to restrict access to specific channels or content.
7. Recording Feature
The premium version allows easy recording.
Simply choose a channel and select Record. You can even watch another program while recording (if you have multiple IPTV subscriptions/playlists).
To watch your recordings, you’ll need an external player such as MX Player.
8. Catch-Up Feature
Missed a show or match? The Catch-Up feature lets you rewatch recent programs—depending on your IPTV provider.
Open a channel and press: Menu > Left Arrow > Right Arrow. Dates will appear, and you can scroll to find the missed broadcast.
9. Add Multiple Playlists
Go to Settings > Playlists > Add Playlist to add playlists from multiple providers.
This allows you to use Multiview or access completely different channel sets from different sources.
10. Adjust Buffer Size (Fix Buffering Issues)
If you experience frequent freezing when changing channels, try increasing the buffer size.
This determines how much video is preloaded before playback begins, improving stream stability.
11. Update EPG (Electronic Program Guide)
The EPG provides a clear, easy-to-read schedule of upcoming programs.
Go to Settings > EPG > Manually Update EPG to refresh the data.
Note: Make sure your IPTV provider includes a working EPG URL in your subscription.
12. Customize and Manage Channel Groups
By long-pressing a channel category, you can:
- Show only favorite channels
- Assign an external player to a category
- Adjust EPG time shift
- Hide unwanted groups
This helps simplify your interface by hiding unused categories or showing only your favorite channels.